1. Open PSE 14. Then open a frame and a paper. Drag and drop the frame anywhere on the paper.

2. Click on the Magic Wand along the left side tool bar. There are four tools in the set. Look at the bottom of your screen to see the four tools. If it isn't already selected, click on the one that looks like Tinkerbelle's wand!

3. Be sure you are on the frame layer and make sure contiguous is checked along that bottom tool bar and then click anywhere inside one of the frames. You will see the "marching ants" walking around the inside of the frame.

4. We now have a selection the perfect shape for the frame. It's a good idea to make it a little larger, so press SELECT on the top menu. That will bring up a drop down menu. Select Modify then Expand. Key in a number (I usually uses 10-20 depending on the thickness of the frame. Press OK.

5. Now you have the marching ants in a shape that is slightly bigger than the frame opening. Now we need a new layer under the frame. Up above the layers box, there are some icons. The first one is the "new layer". Click on that while holding down the CNTL key. The CNTL key tells it to add the new layer under the current one. Otherwise it adds one above. If you do that, you can drag it down below the frame. It should look like this...still with the marching ants.

6. Now we are going to create a perfect photo mask for the frame. With the blank layer selected, go the top menu and press EDIT and FILL SELECTION from the dropdown menu. when the fill layer box comes up select WHITE and press OK.

7. You now have a photo mask...one of the most useful tools in PSE for scrappers. Press CNTL/D to get rid of the marching ants. You are done with the first frame. Select the frames layer and do the preceding steps again for the second frame. Don't forget the CNTL/D at the end to get rid of the marching ants. Layout should look like this:

8. Open two photos for the frame and drag and drop them onto the paper. Each photo should be on the layer immediately above the mask that it will be using. If that isn't where they are, drag the layers around till it looks like this. Select one of the photo layers and size and rotate it to your liking by "grabbing" the corner bounding box.

9. Once they are aligned and the right size (easy to adjust later), select one of the photo layers and press CNTL/G. This will "clip" it to the mask layer and only the pixels that match the mask pixels are displayed. The whole picture is still there and can still be resized and rotated. Select the layer containing the second photo and Press CNTL/G to clip that photo. You'll see the photo "indent" to indicate it's clipped to the layer below.
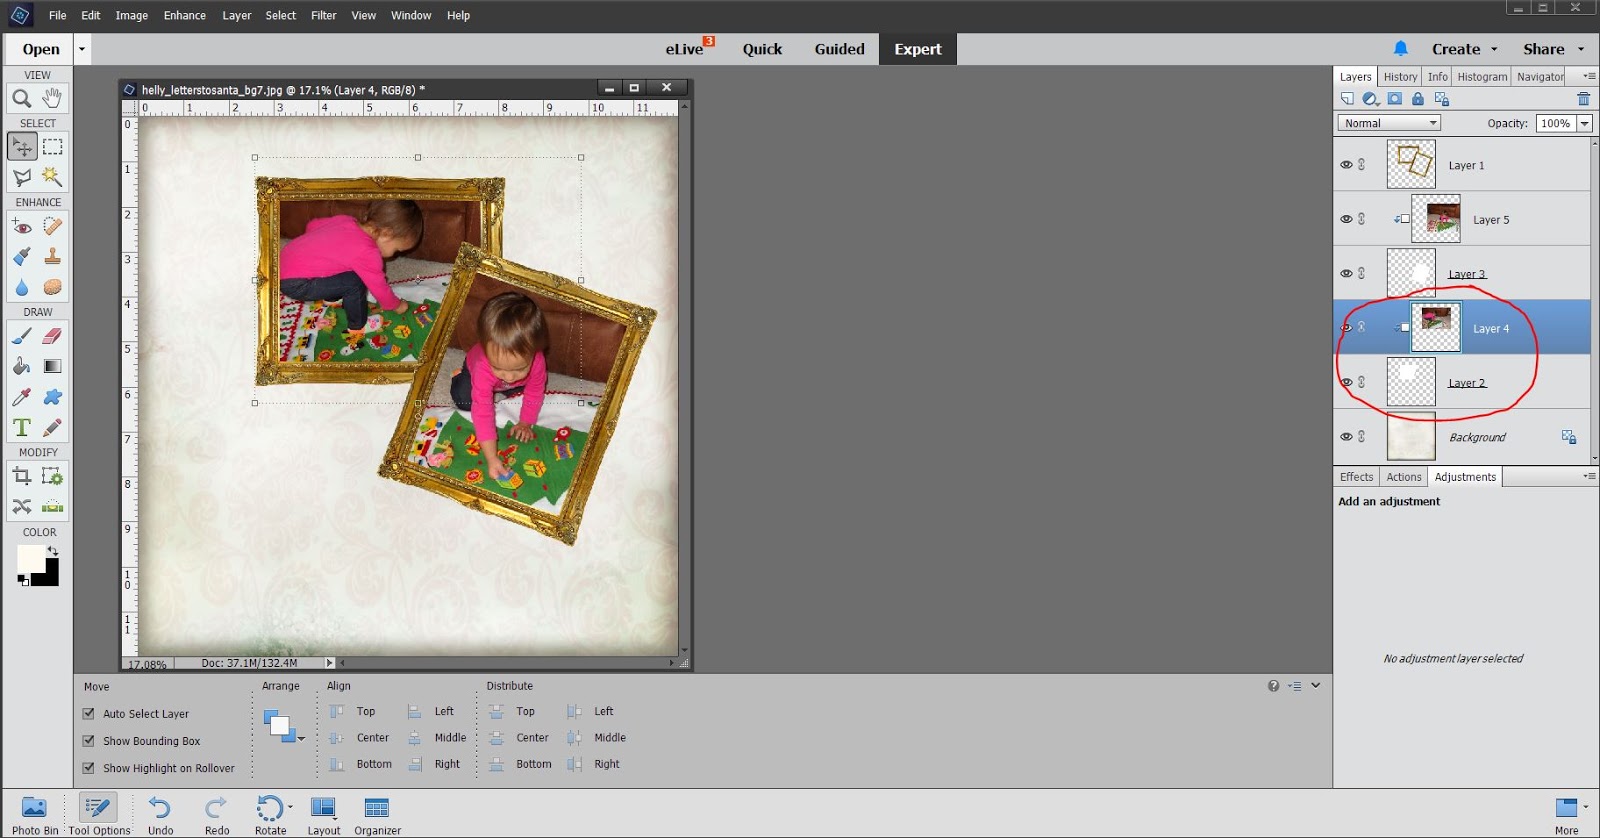
You now have a perfect fit!!!! The best part about using the masks is that your photos are still there...no destructive clipping!
omgosh Mary...you nailed it, I was able to follow this tutorial and I put my pics in the frames...
ReplyDelete