1. Open Photoshop
Elements. Screen prints and instructions
are for PSE 14, but it will work with any version. You just may need to look around for the
tools...some of them have moved over the years.
Next open a photo, an odd shaped
frame and any paper. This will also work
for plain old square frames, but the rectangle selection tool is faster! For this challenge I'm using Indigo's Then
and Now kit which is available in the Pixel Club. If you don't have this beautiful kit, grab
the freebie heart here so you can follow along. Any light colored paper will work for this
tutorial. I chose the Heart Frame since
this is the month of love!
2. Using the Move
tool, drag and drop your photo onto the paper, then drag and drop the frame on
top of the photo. If your photos are
really large you probably need to resize them first so that they are somewhere
in the ball park of what you want to frame.
Close the photo and Heart PNG file.
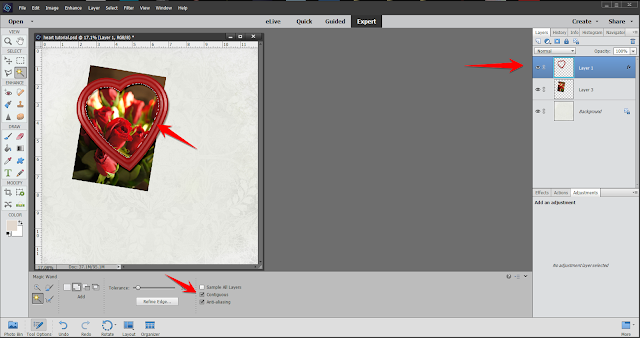
Resize and rotate your photo and the frame to your satisfaction. Your workspace should look something like
this.
3. Click on the Select
Tool along the left side tool bar. My
PSE currently shows the Magic Wand, but your PSE will show the last tool in the
set that you used. There are four tools
in the set. Look at the bottom of your
screen to see these four tools. If it
isn't already selected, click on the Magic Wand, the one that looks like
Tinkerbelle's wand! Be sure you have
the heart layer selected on your page.
The one with the dark blue background is the one currently selected.
4. Now, make sure Contiguous
is checked along that bottom tool bar and then, using the magic wand, click anywhere inside the frame. You will see the "marching ants"
walking around the inside of the frame.
If you also see ants walking around the edge of the paper, you probably
don't have Contiguous checked. Press ESC
to get rid of all the ants, check Contiguous and click inside the frame again.
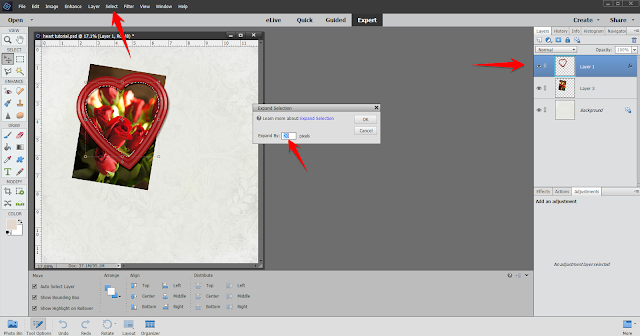
5. We now have a
selection the perfect shape for the frame.
It's a good idea to make it a little larger, so the frame slightly
overlaps the photo. So press SELECT on
the top menu. That will bring up a drop
down menu (which unfortunately doesn't get picked up by the screen capture). Select MODIFY then EXPAND. Key in a number (I usually uses 10-50
depending on the thickness of the frame.
Bigger allows more flexibility if you change your mind about the size,
but if you go too big it will extend past the frame. If you are using the freebie heart frame, 20
works perfectly. If you are using the
same heart I am, you can go 50. If you
are using something really small, like stitches for a frame, you may need to
use 1-3. Press OK.
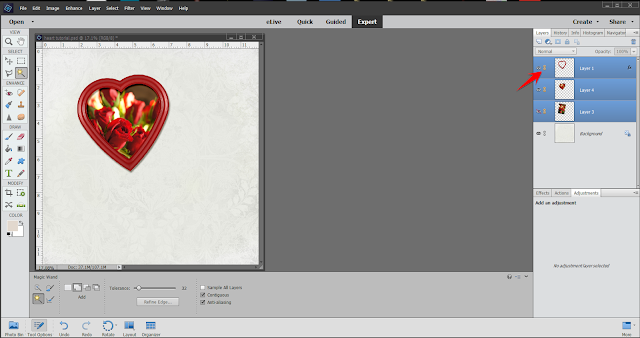
6. Now you have the
marching ants in a shape that is slightly bigger than the frame opening. Switch to the photo layer and press
CNTL/J. This is the copy layer command,
but since you have an active selection, it only copies the selection. You should see your heart shaped photo in a
new layer. the copy layer selection
automatically turns off the selection (marching ants).
Next go to the full photo layer and turn off the visibility
by clicking on the little eye. You have
a photo cut perfectly for the frame! If
you change your mind about how the photo fits the frame, delete the cut layer,
turn the full photo layer visibility back on (re=click the eye) and go back up
to step 3.
7. If you are happy with your results, it's a good idea to
link the layers so the photo and frame don't accidentally get separated. Holding down the CNTL key select each of the
three layers to be linked and then click on the little paper clip inside any
one of them. You will see all three paper clips turn
yellow, which means if you move one, you move them all.
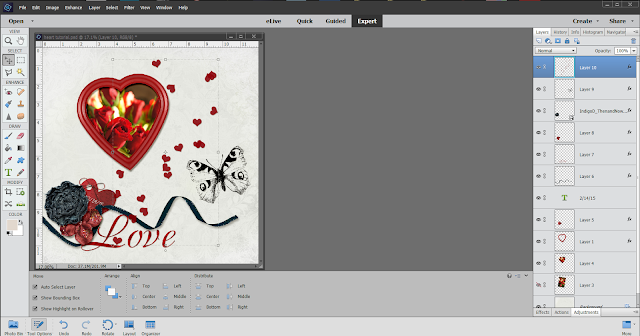
8. Now it's time to finish up the page. Here's my final layout using elements from
Indigo's Then and Now. Happy
Valentines!!!
Can't wait to see your wonderful layouts using this
technique!!!


